
Setting the Cost of Sales NL headings
First decide how you want to do this
Customer Category – if you are already posting your sales by Customer Category, you may want to do the same thing for Cost of Sales.
Against the Product itself
Use the Default Cost of Sales Account
Set the NL Interface rule for Cost of Sales
Cost of Goods Sold’ Nominal Code - If the nominal interface rule for ‘Cost of Sales’ is set to ‘Customer Category’ the NL code is taken from there if not blank, otherwise from the account specified for the resource and if that is blank too the new control account, “Invoicing - Cost of Goods Sold”, will be used.
System Desk
F5 Company Settings
Applications
General Settings
Company Analysis Levels
NL Interface rule
Set Cost of Sales to Customer Category or Resource
Customer Category
F5 Edit and set the Cost of Sales NL code against each one
F12 Apply Changes.
If you are not using Customer Category you need to update the Cost of Sales NL codes on all products. Also, if you are posting by Customer Category you may also have products that you want to post to different NL codes.
These can be updated using the Resource Updater.
When importing new products using the Resource Importer, you need to make sure the spreadsheet used for this has this field added to it. Users who import or set up new products manually need to be aware this field now needs setting for all products that you sell.
Updating your current products using Resource Updater
Your spreadsheet needs to have Part Number and NL Cost of Sales as the headings.
Updating Resources
Select Resource Import Updater from the Caliq Menu. (This may need to be added to a User Menu if not available).
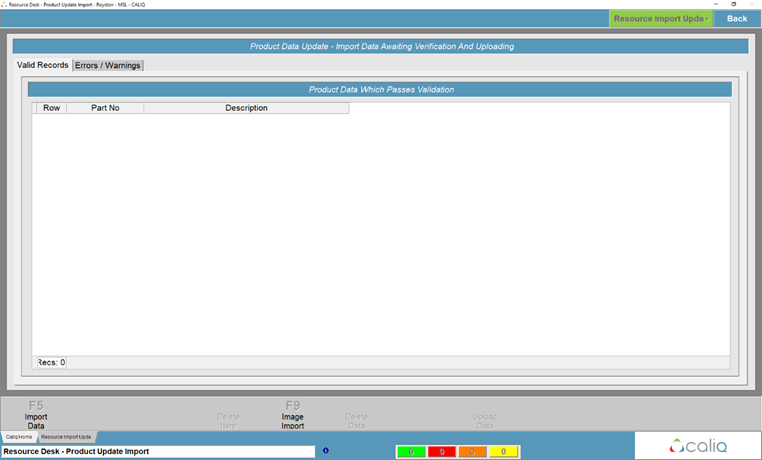
Select F5 Import Data.
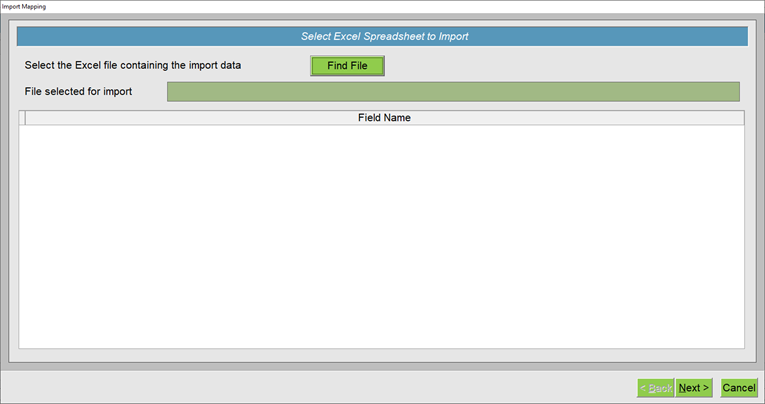
Select Find File. Navigate and select your saved excel file previously generated.
On selecting the file, the available fields will be displayed in the dialogue box.
Select Next.
The fields available for Import (updating) will now be displayed on a step-by-step basis.
Map the Part Number and the Cost of Sales NL code fields
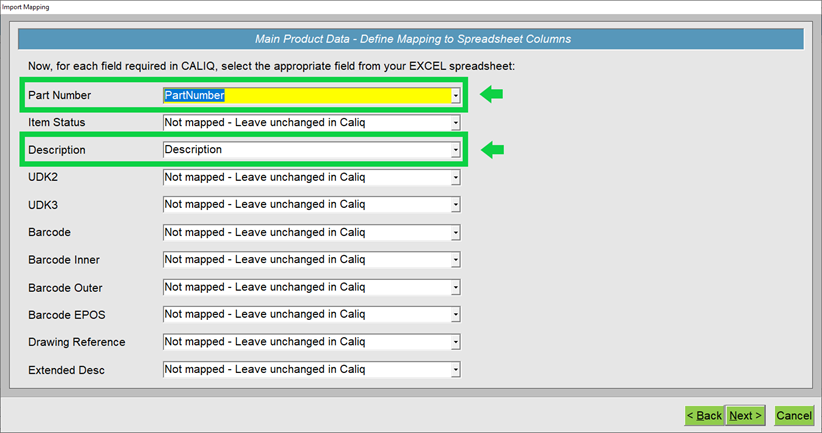
Select Next until you arrive at the Validation screen.
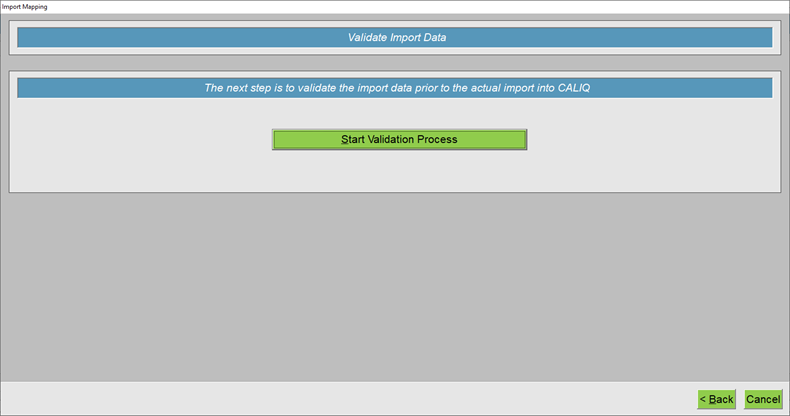
Select Start Validation Process. This action may take a few minutes to complete, depending on the volume of items to be updated. Please be patient and wait for Caliq to respond. Caliq may show as Not Responding during this time, however, Caliq is currently working in the background.
The validation results will now be displayed, showing the Number of Records Accepted (these have no issue and will be updated as required) and Number of Errors Encountered (problematic items that need to be revised in the original Excel spreadsheet and re-imported).
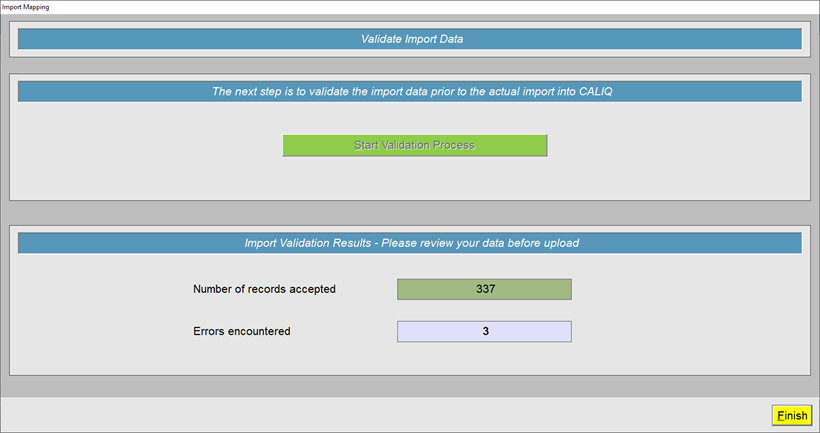
Select Finish.
Select Errors/Warnings Tab to display the problematic stock items (if any). The reason for the error will be displayed against each product.
Select F10 Delete Data to entirely delete your most recent import, allowing you to re-edit your spreadsheet and repeating Step 20-30 again until Errors Encountered displays as 0.
Once you are happy to finalise and make the changes in Caliq, select F12 Upload Data. The following dialogue will be displayed.
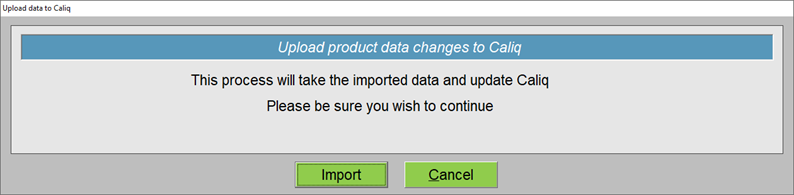
Select Import. This process can take a few minutes to complete depending on the volume of products that require an update. Please be patient and await a confirmation screen.
On completion, the following dialogue will be displayed. The updates have now been made. As a best practice, please log-out and log back into Caliq to ensure all changes are propagated through to your Caliq session.
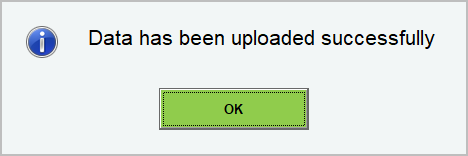
Select OK to close the dialogue. Resource Import Updater can now be closed by using the Back button, returning to the Caliq Welcome Screen.
Now set the following.
System Desk
Company Settings
Applications
Nominal Ledger
Control Accounts
Set the accounts for
Invoicing – Cost of Goods Sold
Invoicing – Stock Account
The next time invoices are posted the Cost of Sales NL codes will be updated.